Pages - Menu

Sunday, June 26, 2011

Onion Tart


Please. Bear with me. I know this blog is for ordinary people. People with jobs. People with families. People without much time on their hands.


People who think they don't have time to make tarts with dough from scratch.


But here's the thing. People who do just a bit of advance planning can serve up gourmet dishes for their ordinary families on an ordinary weeknight.


You can make the dough in advance. One recipe makes enough dough for two tarts. You can make both tarts at once (each one feeds about three people as a main dish), or you can put half in the fridge and use it later in the week. (I think it'll keep for 3-4 days although I haven't tried it for longer than two.)


You can cook up the onions ahead of time, too. You can drop some on the floor in your haste to get them done. Or not.


All that's left is to roll out the dough, assemble the tart and bake it.


Which can be done a couple of hours before dinner if you like. The tart is great at room temperature.


Promise me you'll try it. I'll feel better knowing that you will.

Onion Tart, adapted from The Art of Simple Food (If you don't own this cookbook, buy it NOW)
This recipe makes two tarts, each of which feeds about three people. If you prefer, you can make just half the amount of onions and reserve half the dough for another use. I plan to try some with fruit soon and will let you know how that goes. Oh, and if you're wondering if you can make this with margarine, please don't. The pure buttery taste is part of its magic.


The Dough
2 cups white flour
1/2 teaspoon salt
1/2 cup ice cold water
1 1/2 sticks cold butter

The Topping
2 tablespoons butter
4 tablespoons olive oil, divided
3 large Vidalia onions, sliced thin
5 sprigs of thyme, leaves pulled off
30or so leaves of basil
1/2 cup grated parmesan cheese

First, make the dough. Combine the flour and salt in a medium bowl. Cut the cold butter into small (1/4 inch or so) cubes. Work the butter into the flour with your fingertips. When it's worked in and coarsely crumbly, slowly add about 3/4 of the ice water. Mix it in with a fork and then switch to mixing with your fingers. You'll want the dough to hold together. Add more water if you need to but you should not need more than 1/2 cup. Divide the dough in half, bring each dough together in a ball, and wrap each ball in an individual piece of saran wrap. Once wrapped, flatten each ball to make a disk. Refrigerate for at least an hour or as long as a few days.

Meanwhile, make the topping. In a heavy pot, preferably cast iron, combine the butter and 2 tablespoons of the olive oil. Heat over a medium-low flame. Add the onions and thyme, and saute for about thirty minutes till cooked through and just beginning to caramelize. (Do not, under any circumstances, let it burn!) If the onions seem liquidy, pour of the liquid. Set aside to come to room temperature, or refrigerate for up to 2 days.

Chop the basil as fine as you can (or pulse it in mini food processor.) Mix it with the remaining 2 tablespoons olive oil and parmesan and set the mixture aside at room temperature for up to an hour or in the fridge for up to 2 days.

When you're ready to assemble the tart, preheat the oven to 375*. Line a baking sheet with parchment paper. (Don't forget this step. It's important.)

Flour a work surface and roll out the first dough disk into a 14-inch round. To move it from your work surface to your baking sheet, fold the round in half and then in quarters. This is a wonderful technique I learned from Alice Waters which has taken all the frustration out of rolling out pies.

Once the dough is on your baking sheet, spread it with half the basil/oil/parm mix, leaving a 1-inch border or so all around. Then spread half the onion mix over it. Finally, fold the border up over the onions.

Bake for about 45 minutes, till the crust is golden.

Serve warm or at room temperature.


This post was featured on Culinary Kosher!\

Sunday, June 19, 2011

Weekday Baguettes (Guest Post)


I was honored when Leah Schapira over at Cook Kosher invited me to guest post. I knew this recipe was the perfect one to share. It's super easy, and the timing is flexible enough for a weeknight dinner.

In fact, since I shared the recipe with Leah a few weeks ago, I've made these baguettes at least once a week, sometimes more. They are a new family favorite.

Please visit Cook Kosher for the recipe.

Do you bake bread? What's your favorite formula?


Linking this up to Let's Do Brunch

Sunday, June 12, 2011

Over the Top Mushroom Barley Soup


I'll be the first to admit it. This isn't an every-night soup. It's rich and (somewhat) labor intensive. The ingredient list is kind of long, and kind of expensive.


But it's also really good. Special occasion kind of good.


Rich. Indulgent. Intensely satisfying. Try it. You'll be happy you did.

Mushroom Barley Soup
Don't skimp on the homemade stock; it makes all the difference. Feel free to make the stock ahead of time and freeze it. That's my secret; I put up the stock when I have a quiet evening for simmering. Then I freeze it so this soup is a breeze to make.

6 cups homemade chicken or beef stock (follow these instructions to make a basic stock, but add a package of chicken bones or a cleaned chicken carcass from a roast chicken dinner)
1/2 cup dry white wine
a handful of dried mushrooms
1 tablespoon canola oil
1/2 pound meat (I used sliced beef neck)
1 onion, chopped
4 sprigs fresh thyme, cleaned and chopped
1 tablespoon chopped fresh oregano
1 teaspoon salt
16 oz. fresh white button mushrooms
1 cup pearl barley

Warm the stock and wine in a medium pot. Add the dried mushrooms and simmer for about 10 minutes.

Meanwhile, heat the oil in a large stock pot. (I used my Le Creuset.) Brown the beef on all sides. Remove from the pot and set aside.

Cook the onion on medium heat for 10 minutes or so, till translucent. Add the herbs and salt. Cook for another couple of minutes.

Add the mushrooms to the cooked onions and cook for about 10 minutes longer.

Put the browned meat into the stock pot. Add the stock and dried (now re-hydrated) mushrooms. Bring to a boil and then add the barley. Simmer for at least two hours (more is fine). Serve immediately, or refrigerate for up to two days. Reheat before serving.


Linking this up to Melt in Your Mouth Monday and Mingle Monday.

Sunday, June 05, 2011

Rhubarb Ginger Muffins


I am not a big fan of tart foods. I like sweet and I like savory. Sour, tart foods just don't do it for me.

But the rhubarb at the farmer's market looked so fresh. So seasonal. So local. And it seems like lately all of my fellow food bloggers have been waxing eloquent on the subject of rhubarb lately. I guess I felt like the odd man out.


When my daughter saw the rhubarb, you know what she said? "Blech." (Not sure how you spell it but that's what she said.) "That stuff is sour."


Yeah, it is. But guess what? With enough sugar (and this recipe has plenty of it), it becomes downright tasty.


Rhubarb Ginger Muffins, adapted from Someone Who Bakes


1 1/2 cups chopped rhubarb (about 4 stalks)
2 tablespoons white sugar
2 cups all-purpose flour
1 cup oats
1 cup brown sugar
1/4 teaspoon grated fresh ginger
1 1/2 tsp. baking powder
1/2 tsp. baking soda
1/2 tsp. salt
1 cup water
4 tablespoons unsalted butter or margarine, melted
1 tsp. vanilla extract
1 large egg, lightly beaten
1 tablespoon Turbinado sugar

Preheat the oven to 400*. 

In a small bowl, combine the rhubarb with the white sugar and set aside. 

In a large bowl, mix together the flour, oats, brown sugar, ginger, baking powder, baking soda, and salt. 

In a separate bowl, combine the milk, melted butter, vanilla, ginger, and egg. Stir to combine. 

 Make a well in the center of the dry ingredients, pour in the wet ingredients, and mix until combined (don't over-mix). Add in the rhubarb and mix to combine. 

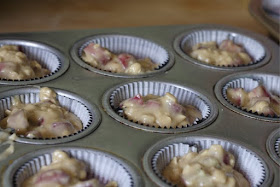
Scoop the batter into muffin tins sprayed with baking spray or lined with cups. You'll want to fill them about 3/4 of the way. Sprinkle the turbinado sugar over the muffins. 

Bake for 20-22 minutes or until a toothpick inserted in the center comes out clean. Cool in the pans for a few minutes before removing.


Linking this up to Kosher on a Budget.