Pages - Menu

Sunday, January 30, 2011

Simple Buttermilk Biscuits


For me, nothing says 'family time' like homemade biscuits (or scones) for breakfast.

As the kids roll out of bed on Sunday mornings, bleary eyed but refreshed from a good night's sleep, they smell that buttery crispy fragrance and their eyes light up.


We all enjoy biscuits. My husband enjoys them with cream cheese. Sarah likes them with butter, and the rest of the kids enjoy them with jelly.  I'll eat them any which way. So long as they are fresh and homemade.

I've tried a few variations, and Molly Katzen's recipe (from one of my very favorite cookbooks, Sunlight Cafe) is our favorite. It's simple, no fuss, and comes out great every time.

If you don't have any buttermilk at home, which I often don't, just add 1 tablespoon white vinegar to 1 cup of milk and let it stand for a few minutes. I don't taste a difference between biscuits made this way and those made with the 'real thing.'

Simplest Buttermilk Biscuits from Sunlight Cafe
I don't stress too much about the rolling and shaping. I don't mind if the biscuits are rough and oddly shaped. 

2 cups white flour
1/2 teaspoon salt
2 teaspoons baking powder
1/4 teaspoon baking soda
1 tablespoon sugar
6 tablespoons cold butter
2/3 cup buttermilk

Preheat the oven to 400*. Lightly spray a baking sheet with nonstick spray.

Place the flour, salt, baking powder, baking soda, and sugar in a food processor or in the bowl of a stand mixer. Mix briefly to combine.

Cut the butter into slices and add them to the dry mixer. Mix as briefly as possible, just till the butter is cut up and the mixture resembles a coarse meal.

Pour in the buttermilk and mix just until the dough holds together.

Roll or pat the dough into a rough circle, about 3/4 inch thick. Cut free form biscuits with a knife or glass.

Bake for 12-15 minutes, or until deep golden brown on bottom and light golden on top. Cool for a few minutes before serving.


Saturday, January 29, 2011

Chocolate Chip Banana Blondie Cake


Note to self. If a recipe calls for chocolate chips, put them in. Especially if the name of the recipe has "Chocolate Chip" in it.

I guess that's what happens when you try to bake a cake an hour before Shabbos. You're likely to miss at least one or two things. Lucky for me, I realized halfway through the baking, and simply poured the chips on top of the cake (and held my breath for the last half-hour of baking time).

Guess what? It was fine! We had ourselves a blog-worthy cake. One I would make again anytime. Next time, I'll mix the chips in as directed. 


Chocolate Chip Banana Blondie Cake
This recipe is taken from Evil Shenanigans with just a couple of changes. I changed the butter to oil, and replaced half of it with applesauce. I also doubled the recipe so I could put half in the freezer for another time, and I reduced the chocolate chips a bit. Fantastic!

1 1/2 cup sugar
1/3 cup canola oil
1/3 cup unsweetened applesauce
2 teaspoons vanilla
4 eggs
1 cup mashed ripe banana (3-4 bananas)
2 teaspoons baking powder
1/2 teaspoon salt
2 1/2 cup all-purpose flour
1 1/4 cup semi-sweet chocolate chips

Heat the oven to 350*. Spray a 9x13 pan with non-stick cooking spray.

In a medium bowl (I used a stand mixer), cream together the sugar, oil, applesauce, and vanilla. Add the eggs and bananas and mix until smooth.

Add the baking powder and salt and mix till combined. Then add the flour. Mix until the dry ingredients are just combined and moist. Add the chocolate chips and mix until evenly distributed.

Pour the batter into the prepared pan and bake for about an hour, or until a toothpick inserted in the center comes out clean. Cool in the pan for at least an hour before serving.


Thursday, January 27, 2011

Cinnamon Sugar Bread


Call this a bread recipe and you're allowed to have a few slices, buttered, for dinner. Call it cake and you'll feel compelled to eat it for dessert and to stop after just one slice.


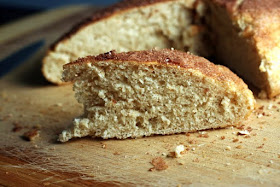
Everyone in my family agreed that this bread tastes (and looks) like dessert. But, hey, it's bread! Eat to your heart's content.


Credit for this recipe goes to Finding Joy in my Kitchen. Thanks, SnoWhite!

Cinnamon Sugar Bread from Finding Joy in my Kitchen
The original recipe calls for all white flour. I felt very virtuous, substituting some of it for whole wheat. Never mind all that sugar. The less-than-two-cups of whole grain flour definitely makes up for it. 

The bread:
1/4 cup warm water
1 teaspoon sugar
2 1/4 teaspoons yeast
1/4 cup sugar
1 cup warm water
1 egg, beaten
1 tsp. salt
2 cups white flour
1 3/4 cups whole wheat flour
2 T butter, margarine, or canola oil, divided
The topping: 
1 teaspoon cinnamon 
3 teaspoons sugar

Combine the 1/4 cup warm water, 1 teaspoon sugar and yeast. Mix well and allow to sit for about 5-7 minutes until foamy.

Next, mix together the 1/4 cup sugar, 1 cup warm water and 1 tablespoon butter.

Add in the egg and the yeast mixture.

Sift together the salt and flour. Add in the whole wheat flour and knead until smooth. Then, add in the white  flour, 1/2 cup at a time, mixing after each addition. The dough will be really soft and kind of sticky.

Remove the dough and place it into a lightly greased bowl. Cover and allow to rise until doubled. Punch down, divide in half, and form into bread loaves and place in a bread pan or pie plate. 

Cover, and let the dough rise until doubled, about 1 hour. Then, drizzle melted butter/margarine/oil over the top of the risen bread. Use a clean hand to smooth it out and then sprinkle with cinnamon and sugar. 

Bake at 350 for 25-30 minutes, until lightly browned.

Allow to cool, then either slice right in the pan (which works really well), or remove from the pan to slice and return for serving purposes.


Linking this up to Koab Recipe Exchange.

Wednesday, January 26, 2011

Creamy Parsnip Soup

Today, I'm delighted to be a guest on Cooking Manager


I pride myself on my healthy eating habits. I eat loads of fresh seasonal produce, and build almost every meal around vegetables. I’m a good role model for my kids, setting an example of balanced and nutritious eating. I serve a wide range of vegetables and prepare them so many different ways. My kids see me and husband eating healthy at almost every meal.

As luck would have it, I have a houseful of picky eaters. Between the four of them, my children eat only four vegetables: tomatoes, cucumbers, string beans, and baby carrots. (I refuse to count potatoes, olives or pickles as vegetables.) They will not eat mushrooms, spinach, cauliflower or broccoli. They balk at peppers no matter what color. Eggplant is completely off limits, and I won’t even tell you what happened when I tried convincing my son to try Swiss Chard. Suffice it to say that we had quite a cleanup afterwards.

But I’ve discovered that they will eat a really wide range of vegetables if I cook them up in soup! Now that winter is upon us, I make an effort to make one or two pots of soup over the weekend. If I make a double recipe, each pot lasts two or three nights, and most soups taste better when rewarmed. Here’s one of my recent favorites. It’s simple and a real hit with kids and adults alike. The kids love it because it’s so sweet, and, the best part is, the sweetness is 100% natural! A mother’s dream!

Tuesday, January 25, 2011

A Formula for Frozen Vegetables


I try my best to eat healthy seasonal foods every day of the week. I build most dinners around vegetables, and try to eat a mostly plant-based diet. But there comes at least one time almost every week when I am just too tired to shop, peel and chop.

That's where frozen produce comes in. It's quick and easy and I always have some on hand. It doesn't require a trip to the grocery store. No peeling, cleaning, or chopping.

At the surface, this is just a recipe for simple sauteed corn. But it's actually a formula for the freshest healthiest tasting frozen vegetables. Use this formula with chopped broccoli, cauliflower, or peas. Vary the herbs if you like, and substitute oil for butter and stock for the milk/cream, for a pareve version.


Sauteed Vegetables
I've tried this formula with frozen corn (my current favorite), chopped broccoli, cauliflower, and English peas. Let me know if you try any others. 

1 tablespoon butter
1 yellow onion, chopped
2 cloves garlic, diced
2 stalks celery, diced
2-3 cups frozen vegetables (corn, chopped broccoli, cauliflower, peas)
4 tablespoons heavy cream or milk or a combination
1/2 teaspoon salt
dash of black pepper
pinch of sugar
1 teaspoon of your favorite herbs, minced (my current favorites are mint and parsley)

Melt the butter in a large, preferably cast iron pan. Saute the onion for about 15 minutes on medium-low heat till it's nice and soft.

Add the celery and saute for another few minutes till it's softening. Add the garlic and saute for 2-3 minutes longer till fragrant.

Add the vegetables and cook, stirring occasionally, for about 10 minutes till heated through and through. Pour in the cream/milk and the seasonings. Heat through, stirring.

Stir in the herbs and serve warm.


Sunday, January 23, 2011

Over the Top Chocolate Chip Cookies


I came across this recipe on Picky Palate about a week ago and have been dreaming about it since. Vivid dreams in full color, full flavor, and full aroma.

Chocolate chip cookies are a serious weakness for me. Healthy eating rules are simply thrown to the wind when there are fresh chocolate chip cookies in the house. Chocolate is another weakness (be honest, here, can you withstand a good piece of chocolate?).

These cookies are of the over-the-top, once-a-year, special occasion variety. They are so rich and fantastic that you just don't want to have them around more often. You just can't.

I knew I had to write about these cookies on one of my blogs. It was pretty clear that I couldn't write about them on my other blog,  Healthy Eating for Ordinary People. These cookies have butter. Chocolate chips. Snickers and Kit-Kat. I thought about the health-conscious people who follow my Healthy Eating blog awaiting recipes for beans and brown rice and whole grain bread. I knew would have a rebellion on my hands. The problem with writing about these cookies here is that while they are most certainly kosher, they are full of Nestle's and Hershey's and many things dairy and Cholov Stam.

But here is the recipe. Enjoy it if you eat Hershey's. If you don't, you can try a Cholov Yisroel or pareve substitute but I make no promises.

Over the Top Chocolate Chip Cookies, recipe from Picky Palate
This recipe makes about two dozen cookies. 

2 sticks softened butter
1 cup sugar
3/4 cup brown sugar
2 large eggs
1 tablespoon pure vanilla
1 teaspoon baking soda
1/2 teaspoon kosher salt
3 1/2 cups all purpose flour
10 oz bag chocolate chips
20-24 snack size Reeses Peanut Butter Cups, Snickers and Kit Kat

Preheat oven to 350*. In a stand or electric mixer, cream butter and sugars until well combined. Add eggs and vanilla until well combined.

Add baking soda, salt and flour. Add chocolate chips to combine. 

Using a cookie scoop, take one scoop of cookie dough and place on top of snack size candy bar. Take another scoop of dough and place on bottom of candy bar. Seal edges together by pressing and cupping in hand until candy bar is enclosed with dough. Place onto a foil, parchment or silpat lined baking sheet and bake cookies for 15-20 minutes or until cookies are baked to your liking. Let cool for 5 minutes before transferring to cooling rack. Serve with a tall glass of milk, enjoy!


Saturday, January 22, 2011

Mission Chulent: Week 8

We're on the eighth week of our chulent (a.k.a. cholent) experiment (I'm trying a new recipe every week, as long as my friends keep providing!), and we've found a few favorites.  This week's recipe was my own concoction  based on the Indian Style Chulent I wrote about last week, and my Turkey Chulent. I thought it was terrific (the aromas certainly were), although my husband Avi wasn't a big fan of the cinnamon and allspice. Leave them out or reduce the quantity if you prefer. 

The recipe is below. I'm also including links here to all of the other recipes we've tried so far in case you want to try any others. 

Indian Inspired Turkey Chulent

3 celery stalks, cut into a few pieces
1 yellow onion, chopped
3 cloves garlic, chopped coarse
2 russet or yukon gold potatoes, peeled and cubed
1 sweet potato, peeled and cubed
1 cup dried chickpeas, soaked overnight and drained
1 cup wheat berries
2 teaspoons salt
1 teaspoon cumin
1/4 teaspoon cinnamon
1/4 teaspoon coriander
1/8 teaspoon allspice
1/8 teaspoon cardamom
2 turkey drumsticks, skin removed

Put everything into a nice large pot or crock pot, in the order listed. Add water to cover. Bring to a boil and then reduce to low. Leave the chulent simmering on low until Shabbos morning, or until you're ready to eat, at least 24 hours if possible. Serve hot.

Wednesday, January 19, 2011

Tu B'Shvat Fruit


I have a serious weakness for dried fruit. That super sweet, super concentrated flavor is better than candy. 

What’s amazing is that my kids enjoy it too. It’s (almost) as much of a treat for them as artificially sweetened candy. (It also helps when I buy a few pieces of chocolate covered fruit.) 

I don’t usually indulge in much dried fruit, but today was the exception. It’s Tu B’Shvat!


No recipes today, just some pretty pictures of our pretty fruit. 


Monday, January 17, 2011

Slightly Special Baked Ziti


Raise your hand if you're a mom. Now, keep your hand raised if you have found a dinner that your ENTIRE family will eat (yes, including you!). Is it an easy dinner? Can it be made ahead of time? Is it reasonably healthy and not likely to raise your cholesterol / BMI / waist size more than 5%? Bet there aren't too many of you with your hands still raised!

Today I came up with a recipe that comes pretty close to meeting all these criteria. It's easy. It can be made ahead of time and refrigerated for a couple of days. It's not too high on the calorie/fat scale. And almost everyone in the family enjoyed it.

I was hoping you wouldn't comment on the 'almost.' (I even shrunk down the font size in the hopes you wouldn't notice it.) I have to admit (please don't think less of me): I am not a real pasta fan. I have nothing against it. It's satisfying, tasty, and usually easy to prepare. But I think of pasta as an indulgence, and if I'm indulging, I'd rather have homemade bread. Or some dark chocolate. Or a piece of chocolate cake. Or maybe a good medium-rare steak. Pasta just isn't worth it to me.

That being said, five out of six is pretty good. Who cares about Mommy anyway? She can always just eat some yogurt or toast. (Seriously.)

This dish is nice because it's just a cut above the standard Baked Ziti. Maybe it's because it requires the use of a blender, or maybe it's the creaminess of the sauce, but I think this recipe is just a bit more elegant. The kids loved it and so did my husband Avi. So in my book, this was a real winner.

Slightly Special Baked Ziti
Use milk for a lighter recipe; cream if you aren't counting calories. To make it ahead of time, prepare the pasta but hold off on baking it. Refrigerate it for up to two days. Just let it come to room temperature for a couple of hours before baking, or increase the baking time by about 20 minutes. 


1 box of ziti or penne
1/2 of a 26-oz. jar of your favorite marinara sauce (I use Frescorti
1 cup ricotta cheese (I use part skim)
1 cup shredded mozzarella cheese
3 tablespoons grated parmesan cheese
1 cup milk or cream (or less)

Preheat the oven to 350*.

Cook the pasta till it's done but still firm. Make sure not to overcook it.

While the pasta cooks, combine the marinara sauce and all three cheeses in a blender. Add up to a cup of milk or cream, as needed, just enough to get the blender working through the thick mixture. Blend for a minute or two until well mixed and smooth.

Put the pasta into a 9x13 glass or disposable aluminum pan. Pour the sauce over the pasta and mix well.

 Cover and bake for 30 minutes. Uncover and bake for 15 minutes more. Serve immediately.

Cooked (naked) pasta

Doesn't this look
pretty? 

The blended sauce

Mixing the sauce in with the pasta


Pasta before baking

Thursday, January 13, 2011

Chickpea and Barley Stew


I discovered in the recent blizzard that I keep enough food in my home to stock a family of six for at least two months, probably more. I don't know if it's some kind of primal survival instinct, or just poor planning and budgeting, but I am not exaggerating when I say that we could go for MONTHS without a grocery trip. Right now, just to give you an idea, the top shelf of my pantry holds 11 boxes of pasta, 13 cans of tuna and 2 cans of salmon, 7 bags plus 14 cans of beans, 1 bag of split peas, 2 bags of lentils, 2 bags of barley, 2 bags of wheat berries, 4 cans of mushrooms plus a HUMONGOUS container of dried mushrooms, and 2 five-pound bags of flour. And that's just ONE shelf. (We have another four upstairs and three downstairs.)

It's rather scary.

Last week, I decided to do without any groceries, with the exception of milk, bread, and a few very basic fresh vegetables. We're cleaning out our pantry and it FEELS GOOD. This recipe is easy, healthy, and very economical.

Chickpea and Barley Stew
I have a plethora of dried beans at home, so I used those. You could easily use canned beans instead. Just add them along with the sweet potatoes instead of with the barley. I served some plain yogurt next to this dish (read more about my simple yogurt formula on my other blog) and called it a meal. 


1 tablespoon canola oil
1 yellow onion, minced
2 stalks of celery, chopped fine
1 carrot, peeled and chopped fine
4 cloves garlic, minced
1/2 teaspoon cumin
1/4 teaspoon coriander
1/8 teaspoon cinnamon
2 whole cardamom seeds (or use 1/8 teaspoon ground cardamom)
1 teaspoon salt
1 cup barley
1 cup dried chickpeas, soaked overnight and drained
1/8 cup soy sauce
2 sweet potatoes, peeled and cubed
6-8 large mushrooms, washed and sliced

Heat the oil in a large pot. Add the onion and saute on medium for about 5 minutes. Add the celery, carrots and garlic and saute, stirring, for about 2 minutes until the garlic is fragrant. Add the spices and salt and continue to cook for another minute or two, stirring. Add the barley and cook for another minute or two, still stirring.

Add the chickpeas plus enough water to cover. Cook for about two hours, till the barley and chickpeas are tender but not mushy.

Add the soy sauce and sweet potatoes. Cook for another 1/2 hour.

Add the mushrooms and cook for a 1/2 hour longer. Serve warm.


Tuesday, January 11, 2011

Special Occasion Chocolate Cake


Ordinary people make easy cakes. Cakes that get mixed in one bowl. Cakes without icing or frills. Cakes that get baked in a 9x13 disposable pan which gets tossed in the recycle bin and forgotten. 

Ordinary people definitely do not make cakes that use six bowls and two beaters. They do not make cakes that require separating of eggs. And they definitely do not make cakes that get made in real pans that have to be washed and dried. 

That's why this is a Special Occasion Chocolate Cake. It's not a cake you make for an ordinary dessert or when you have just a bit of extra time on your hands. It's a cake that should be reserved for special times, when you're willing to go the extra mile. Our special occasion this week was my husband Avi's birthday. 

This recipe is based on the "Chocolate Cake" recipe in the Joy of Cooking. The icing is the "Chocolate Butter Icing," also from Joy. I used all margarine instead of butter since we wanted a pareve dessert. 

Special Occasion Chocolate Cake
This recipe has a lot of steps but isn't at all complicated. Be sure to allow enough time for prepping, baking, cooling and icing. (It took us just about two hours from start to finish.) 

CAKE
3 ounces chocolate chips
5 tablespoons boiling water
1/2 cup margarine
1 1/2 cups sugar
4 eggs, separated
1 teaspoon vanilla extract
1 tablespoon dry rum

1 3/4 cups flour
3 teaspoons baking powder
1/4 teaspoon salt
2 tablespoons cocoa powder
1/2 cup water

ICING
2 ounces chocolate chips
2 tablespoons margarine
1/4 cup cream (or pareve Rich's whip)
1/8 teaspoon salt
about 2 cups confectioners sugar

CAKE
  1. Preheat the oven to 350*. 
  2. Melt the chocolate in the microwave or over a double boiler. Add the boiling water and mix. Set aside to cool. 
  3. Meanwhile, cream the margarine in an electric mixer for a couple of minutes, till soft. Add the sugar and mix till light, about 5 minutes, scraping down the sides of the bowl a couple of times in middle. Add the egg yolks one at a time, and then the vanilla and rum. Mix until incorporated. Add the dry ingredients, chocolate mixture and water. Mix well and set aside. 
  4. In a separate bowl, whip the egg whites on high speed till stiff but not dry. 
  5. Fold the egg white lightly into the chocolate batter.
  6. Pour half the batter into each of two well greased 10 inch round pans. Bake for about 35 minutes, or until a toothpick inserted in the center comes out clean. Let cool thoroughly before removing from the pans. 
ICING
  1. Melt the chocolate in the microwave or in a double boiler. Add the margarine to the chocolate and stir well till dissolved. 
  2. Add the cream and salt, and then gradually add the sugar and vanilla. You might not need all the sugar, so add it slowly until the icing reaches the desired consistency. 
ASSEMBLY
  1. After the cakes have cooled completely, lay the first cake on a round plate or platter. Put about 1/3 of the icing on it and spread it evenly. 
  2. Lay the second cake on top of that and spread the top and sides with icing. 
  3. Decorate with sprinkles or chocolate shavings if desired. 
  4. Refrigerate for up to three days, or serve immediately. 
Egg whites, beaten till stiff

The chocolate batter

The chocolate batter once again.
It's THAT GOOD.

The icing

The two cakes before baking
The two cakes after baking

One of the best
cookbooks I own
Linking this up to Ultimate Recipe Swap.